How To Separate Emails In Gmail
🕐 1 Jul 23

In this article we will show you the solution of how to separate emails in gmail, Gmail is one of the most popular email services in the world. It has around 1.5 billion active users and all these users utilize Gmail to share personal and business-related correspondences.
Gmail has become a big part of our daily lives and because of that, some of the smaller, most basic features have become innate in today's world.
One of the most basic features of Gmail is the automatic threading feature.
When a person receives a reply to an email, Gmail automatically organizes that reply under the same subject with the original email into one view, so that everything gets arranged in a chronological order.
This way, every reply becomes an email of its own and gets threaded with the original email and everything falls in one single place. It is very convenient.
Why Separating Emails is Important?
Through Gmail, we may receive a lot of different kinds of emails depending on how we use it - for business or for personal use.
Because of this, it can get confusing for us to find the important ones to go through them. In such cases, organising emails in different threads becomes an important thing to do.
Step By Step Guide On How To Separate Emails In Gmail :-
The steps below are to be followed by the user if they wish to separate and organise their emails:
- At first you need to open Gmail from their laptop or computer.
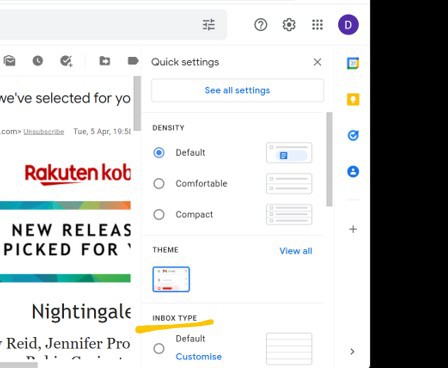
- Next, they will need to click on the "Settings" option at the top right corner of the screen, symbolised by a gear icon.
- After clicking on settings, a box will appear, and then the user will need to click on the "Inbox type" option.

- Once that option is selected, the user will then need to choose the "Multiple inboxes" option.

- Once that is done, the user can now change the Multiple Inbox settings by choosing to customize.
- Then test out the new settings by entering the search criteria for each section:
- To search for starred emails, the user will need to use is:starred.
- When the user searches an email address, the new settings will also show emails from their alias.
- When the user will search "from:email", the results will also return Drive notification from when the receiver shared files with the user.
- Now, set up a new name for each section.
- Next to the "maximum page size" option, the user will need to enter the number of emails they want to see in that section.
- Then choose where you want to place the sections, which is next to "multiple inbox positions"
- After everything is done, select "Save Changes" to finalise the changes made.
Conclusion :-
This way, users can easily sort out their emails to check the ones they priorities more.
I hope this article on how to separate emails in gmail helps you and the steps and method mentioned above are easy to follow and implement.


