

In this article we will show you how to save a word document as a picture MS Word does not provide you with the feature of a screenshot under the insert tab. With the help of this feature, you can easily take a screenshot of the appearing window and you can easily insert it into the document.
You can either save one page of the document as a picture or you can also save multiple pages of the word document as a picture.
Step By Step Guide On How To Save A Word Document As A Picture :-
- Open the word in your system.
- Now you need to select the document which you want to save as a picture.
- Open the Word document and scroll to the specified page you want to be saved as an image in your screen.
- Now you need to change the zoom level. In order to do so, you need to click the view tab which is placed at the top of the MS Word screen.
-
The view tab will provide you with various options for views, immersive, page movement, show, window, macros, and Sharepoint.
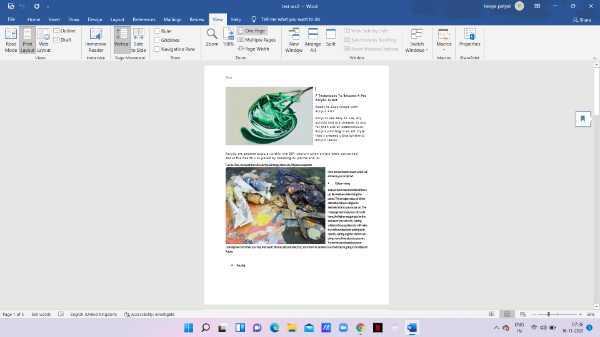
- As you can see in the picture, there are two options for zoom. The first option is 1 page and the second option is multiple pages.
-
In case you want to save multiple pages of your word document as one image. Choose the option of multiple pages. Now all these pages will appear in front of you in one screen.

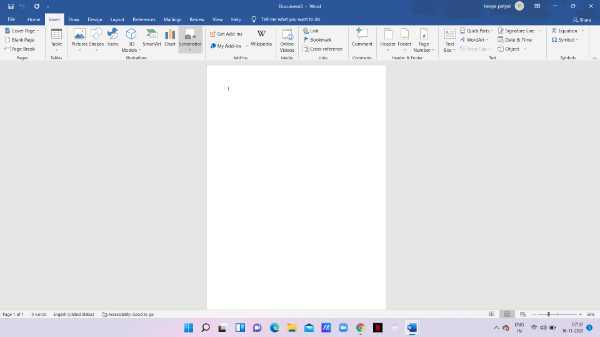
- After this in the word window, you need to tap the file. under file click the option of new.
-
This will create a new document and a blank document will appear on your screen.
-
In this step, you need to click the Insert tab which is placed at the top of the MS Word toolbar.
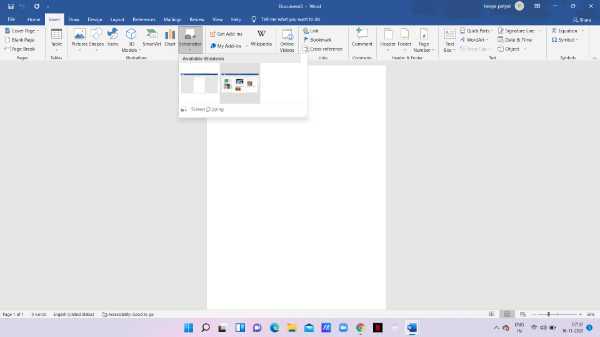
- With the help of the insert tab, you can insert tables, pages, illustrations, add-ins, Media, links, comments, header and footer, text, and symbols.
- Click the option of screenshot which is given in the illustration column.
-
Now you need to choose the screenshot of the document that you want to save as a picture from the drop-down list.

- There is also another method of adding a screenshot and saving it as a picture. You can also tap insert> screenshot> screen clapping.
- Now the screenshot you selected will be placed in the new document.
- You need to right-click the screenshot you have selected. A drop-down menu will appear on your screen after you right-click the screenshot. it will show various options like cut, copy, paste, save as picture, change the picture, and link.
-
Click the option- save as picture.
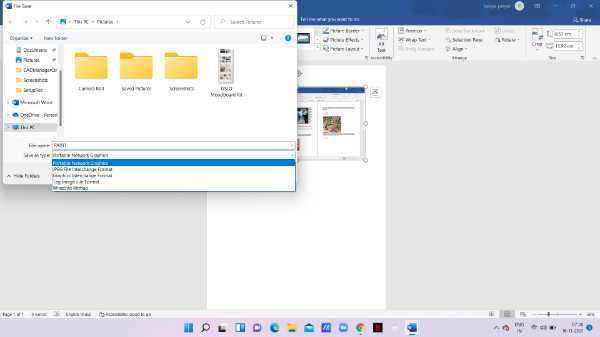
- A file saving dialogue box will appear on your screen where you need to the destination for the folder where you want to save the image.
-
Enter the details like the name of the image and the image type from the drop-down list as JPG, GIF, or any other format.

- In the last step, you need to hit the save button.
Conclusion :-
I hope this article on how to save a word document as a picture helps you in this article, we covered an essential guide I hope this article solves your query.


