

In this article we will show you how to remove markup area in word, MS Word is a tool of the Microsoft office which is concerned with creating documents like resumes, assignments for school and college, an application form, a formal notice, softcopy of a formal speech, research paper, book, etc.
It is thus, used by millions of people all over the world and across all age groups for their personal and professional reasons and needs.
It offers a wide range of features and tools like tables, shapes, font, animations, etc. that help a user make their documents attractive, neat and wholesome.
The mark-up area in a MS Word document appears each time a document features any comment, but its display is controlled by settings on the Review tab.
Step By Step Guide On How To Remove Markup Area In Word :-
-
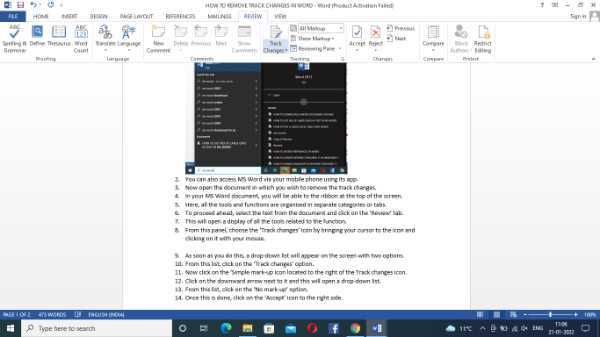
Click on the ‘Review’ tab located at the ribbon at the top of the screen.
-
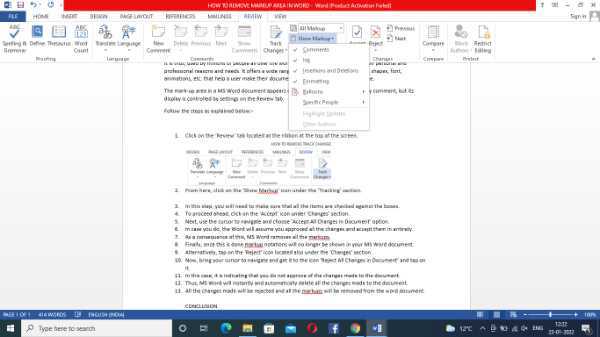
From here, click on the ‘Show Markup’ icon under the ‘Tracking’ section.

- In this step, you will need to make sure that all the items are checked against the boxes.
-
To proceed ahead, click on the ‘Accept’ icon under ‘Changes’ section.
-
Next, use the cursor to navigate and choose ‘Accept All Changes in Document’ option.
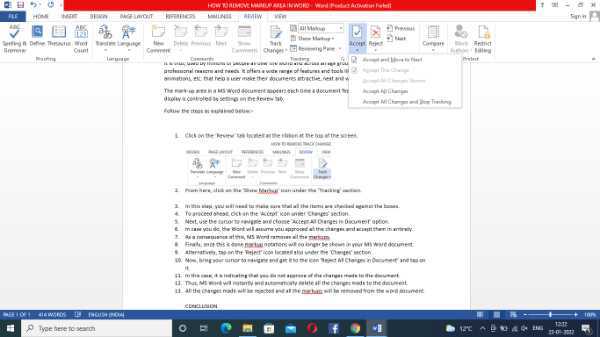
- In case you do, the Word will assume you approved all the changes and accept them in entirety.
- As a consequence of this, MS Word removes all the markups.
- Finally, once this is done markup notations will no longer be shown in your MS Word document.
- Alternatively, tap on the ‘Reject’ icon located also under the ‘Changes’ section.
-
Now, bring your cursor to navigate and get it to the icon ‘Reject All Changes in Document’ and tap on it.

- In this case, it is indicating that you do not approve of the changes made to the document.
- Thus, MS Word will instantly and automatically delete all the changes made to the document.
- All the changes made will be rejected and all the markups will be removed from the word document.
Conclusion :-
This is how you can remove the markup area in your MS Word in just a few quick and easy steps. I hope this article on how to remove markup area in word helps you and the steps and methods mentioned above are easy to follow.


