

In this article we will show you how to organize google photos into albums, Google Photos offers a feature of Albums where one can organize your photos and sort them accordingly.
You can add, edit, or delete photos from an album any time.
Here in this article we will teach to organize the Google photos into albums.
Step By Step Guide On How To Organize Google Photos Into Albums :-
Method 1- By creating an Album
- At first go to the Google Photos app on your smartphone.

- All backed-up photos will appear on your screen.
- Then, long press on one of the selected photo.
- Now, circles will appear at the upper left corner of every photos.
- Select the particular photos which you want it to move them in a certain album.
- Then, click on the "+" sign icon at the top of your screen.

- A slider menu box will appear from the bottom of the screen.
- Click on the Album option under the Create section.

- Then, enter a title for the album in the Add a title field.

- After adding the title, just select on the tickmark icon at the top most left side of the app screen.
- By following the above steps your album will be created. Now, by simply clicking on the Album option you can view that particular selected photos.
Method 2- By Adding photos to an Album
- Firstly open Google Photos application on your device.
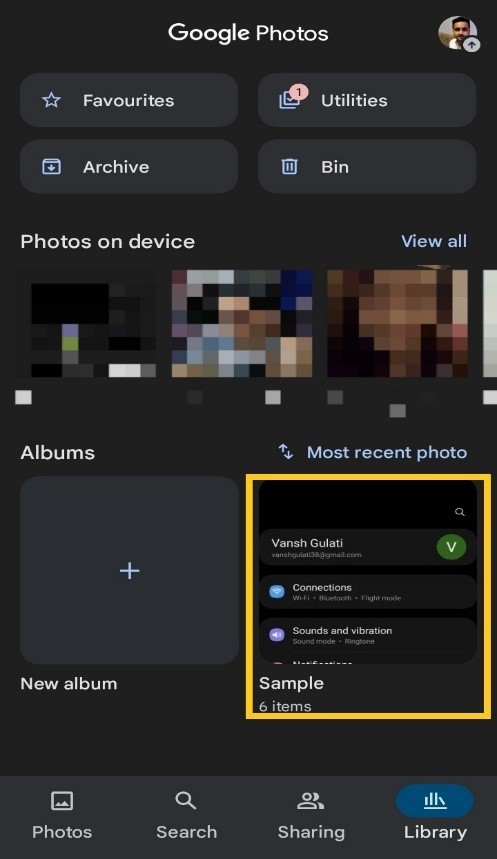
- Select the Library option which is at the bottom right corner of the navigation bar.
- From it select the specific Album where you want to add photos
- Then, that particular album will open on your screen.
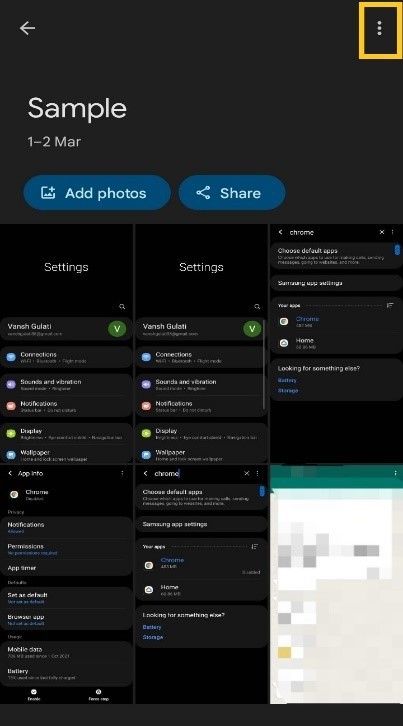
- Click on the three vertical dot icon which is at the top most right side of the screen.
- A menu box will open at the top-right corner of the screen.
- From it, select edit album option.

- Now, you have an access to edit the album.
- Select the Add Photo icon which is at the upper part of the screen.
- After selecting Add Photo icon, Add Photos page will appear on your screen.
- From it tap on a photo which you want to add to the album.
- After selecting the photos the circle at its upper left corner will turn into a blue color tickmark.
- At last click on the ADD option which is at the upper right corner of the app screen.
Conclusion :-
By following the above given steps will add the selected photos to your album.
So, now I hope you won't face any difficulties in organizing Google Photos into albums and I hope this article on how to organize google photos into albums helps you


