

In this article we will show you how to keep your screen from turning off windows 10, if you are using a desktop or laptop that comes with the Windows 10 operating system, then you may have noticed that the lock screen feature is enabled by default.
This means that when you step away from your computer for any period of time, it will automatically go into sleep mode.
Windows 10 offers many new features and the ability to prevent your screen from shutting off is one of the finest. Many customers enjoy this, because it allows them to continue working without worrying about sleeping or totally shutting down their PC.
Sometimes you have difficulty keeping your screen from dimming, even with the best of intentions. You might easily forget to set a reminder or switch on the saver if you want to continue working. Luckily, the situation may be avoided with a remedy.
You will not sleep on your computer until you instruct Windows 10 to do so if you choose this option.
Step By Step Guide On How To Keep Your Screen From Turning Off Windows 10 :-
With The Help Of The Settings App
-
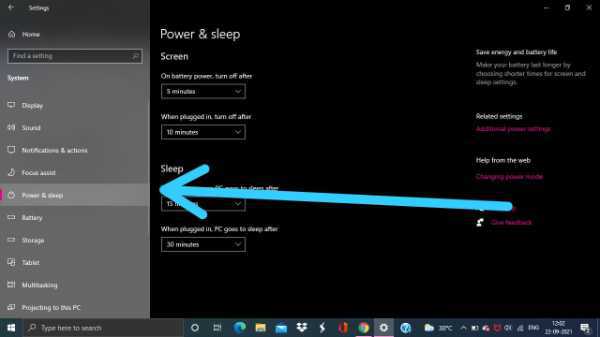
Use the Win+I keyboard shortcut to set up Windows settings and then go to the system> Sleep & Power.

-
Move right to the screen section and locate. Then click on the menu and set "On battery power, turn off after" like never before.
-
Similarly, click the menu below it and set "When plugged in, turn off after" like Never.
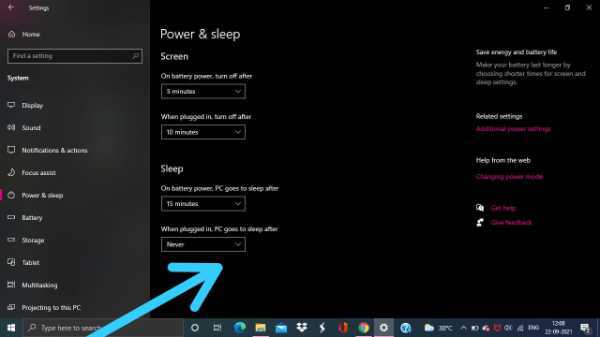
- Your computer display will not automatically turn off after performing the aforementioned instructions.
Use Command Prompt
- You can also keep your screen from turning off by running a simple command in Command Prompt.
- Open the Run dialog box using the Win+R keyboard shortcut.
- In the text field, type Ctrl+Shift+Enter keys to open Command Prompt with admin privileges.
- Click on the Yes button if UAC popup on your computer screen.
- In the Command Prompt window, type the following command - powercfg -change -monitor-timeout-ac 0
- Press the Enter key to set timeout setting to never
- Furthermore, you can also set your screen timeout settings to never when your PC is running on battery. To do this, type the following command and hit enter to run it - powercfg -change -monitor-timeout-dc 0
- After running the above commands, it will set your screen timeout setting to never turn off.
By Using Control Panel
- The next option is by using a control panel that allows the Windows 10 screen to be turned off.
- Open the Control panel.
- Go to the right upper corner of the screen to ensure that the view is set to the category by option.
- Now navigate to Hardware and sound > Power Options.
- Click on the link called Choose when to turn off the display from the left pane.
- Set the "Turn off the display" option to Never use the drop-down choice for battery use or plug-in in the Edit plan Settings box.
Conclusion :-
I hope this article on how to keep your screen from turning off windows 10 helps you to keep your display in windows 10 off. These steps will work with any type of Windows 10 computer, laptop, and tablet device. Thank you.


