

In this article we will show you how to do hanging indent on google slides we can define a hanging indent when the second and the following lines of the selected text are intended to the right side so that the first line of the text stands out as the only single line touching the margin of the Google slide page.
Hanging indents are usually used in Bibliography for reference pages. Hanging indent help to make a presentation look more impressive by giving a certain accent to a specific part of the text.
Hanging indents are used for quote pages and reference pages. Hanging indents are also useful in case of Google slide pitches.
In case your presentation has certain details that require proper citation and attribution hanging indents are quite useful.
Step By Step Guide On How To Do Hanging Indent On Google Slides :-
- Open Google on your PC.
- Click the 9 dots that are placed next to your Google account on the Extreme right corner of the Google page.
- These nine dots represent the Google apps. Scroll down and look for the Google Slides.
- The homepage of Google Slides will appear on your screen which shows your recent presentation along with the option of creating a New presentation with the help of a template.
- Now you need to select the specific presentation Where you want to create a hanging indent on Google Slides.
- First, you need to make sure that the ruler is visible. In case it is not visible, click the view tab placed below the title of your presentation.
- The view tab will show various options like the present, animations, master, grid view, zoom, show Ruler, guide, snap to, show speaker notes, and full screen.
-
Click the option of show ruler now the guiding lines will appear on the top of the Google slide.

- Now you need to choose the text that you want to indent. In Google Slides you can choose over one paragraph for creating indents.
-
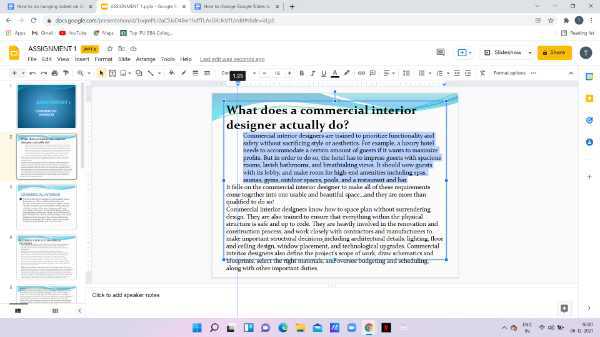
In order to do a hanging indent, you need to indent the complete paragraph. To do so move the left indent marker towards the right side. The left indent marker is represented by an Inverted Triangle.
-
Now you need to move the first-line indent marker again to the left margin. This is represented by the light blue rectangle.
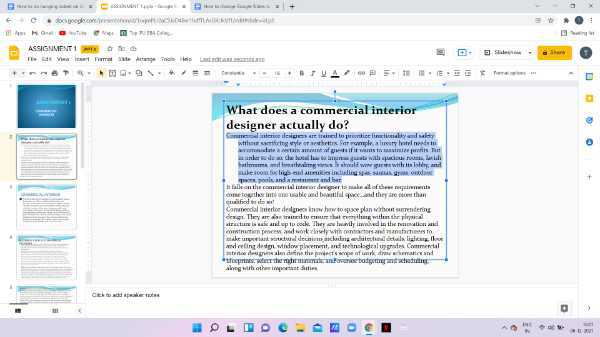
- As you can see in the picture given above your hanging indent is successfully created.
Conclusion :-
I hope this article on how to do hanging indent on google slides in this article we covered an essential guide and the steps and details mentioned above are easy to follow.


