
In this article we will show you how to automatically label emails in Gmail, in Gmail, you can create as many labels as you want and you can easily sort them out as per your convenience from the starting spam.
With the help of a label, you can easily distinct all your emails and arrange them in order. Labels are Google mail speak for the folders and it can automatically identify and classify and organize all your email with the help of the labels you have created.
Step By Step Guide On How To Automatically Label Emails In Gmail :-
In this article, we have created the label of junk that will help to distinct through all the spam emails that the Gmail filter can't identify.
- Open the Gmail application on your desktop.
- Click the three horizontal lines placed at the top left corner of the Gmail homepage.
- Look through the menu and you will see various options such as inbox, starred, snoozed, sent, and drafts. Click the option for more.
-
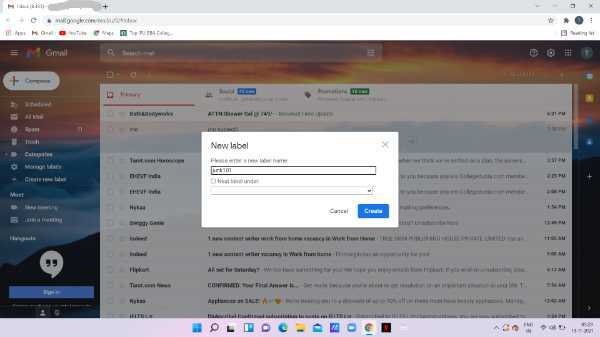
Click the option- create label placed at the bottom of the menu options.

-
Now Gmail asks you to write a title for the label which should be meaningful. After writing the title for the label select create.
- In this step, you need to choose your newly created label and select the down arrow In the search field placed at the top of the page.
- Click the search option placed at the top of the search field just beside the label you created.
- In this step, you need to create a new filter and you can search the mail with the help of form, to, subject, has words, doesn't have, size, date within, search, has attachment, don't include chats.
-
In the option of has the word- Type your newly created label- unsubscribe.

-
Click the option- create filter placed at the bottom.

- Again a drop-down menu will appear regarding the label unsubscribe which show you various options like skipping the inbox, mark as read, star it, apply the label, forward, delete it, never send it to spam, always mark it as important, never mark it as important, categorize as, and also apply a filter to 29 matching conversations.
-
Among all these options looks for Apply the label.

-
Now you need to choose the label that you created- junk .
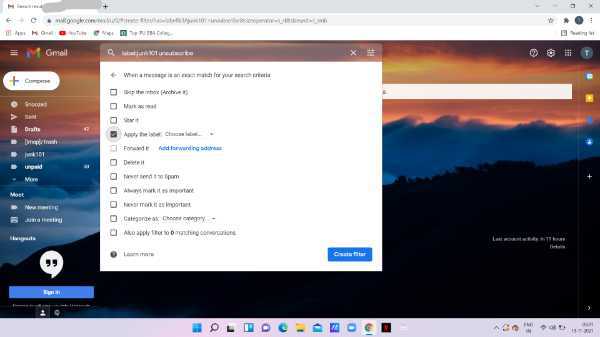
- In this step, you need to look for the box beside any other operator you want. Mark as read is helpful.
- In the end, you just need to choose to create a filter.
Conclusion :-
I hope this article on how to automatically label emails in Gmail helps you, in this article, we covered an essential guide.
For this article; we have created a new label named junk. the steps mentioned above are quite detailed and easy to follow.


